Jump to: Configuring Email Service | Configuring SMS Notifications | Configuring Authy (Push Notifications) | Configuring Health Notifications | Configuring Identity Providers | Configuring Webhooks | Webhook Data Format
Configuring Email Service
Plurilock DEFEND has been configured for you at initial deployment to use DEFEND's cloud-based service for email notifications to administrators.
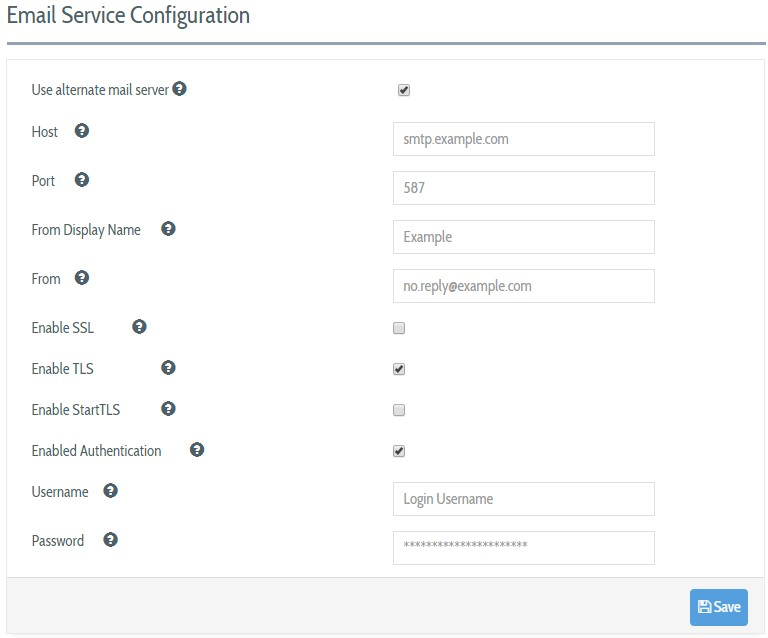
To alter the method that DEFEND uses to deliver administrative email, navigate to System Configurations → Email Server, make any desired changes, and click on the Save button before leaving the screen. You may optionally configure DEFEND to:
- Use a local mail daemon to contact destination servers directly by unchecking the "Use alternate mail server" option (not recommended)
- Replace the preconfigured cloud-based email service details with details for your own SMTP service.
NOTE
This email server will be used to send all DEFEND console administrative email, including site keys, password resets, and risk alerts. For this reason, it is important that email be correctly configured and operational when using Plurilock DEFEND.
NOTE
You need to retype the password before pressing the Save button every time you update the Email Service configurations.
Configuring Out-of-Band (OOB) Notifications
DEFEND user groups can be configured to send a notification directly to end users each time a high-risk enforcement state is reached to complete a step-up authentication workflow.
Direct notification to end users has the key advantage of accelerating DEFEND's ability to learn about each user, i.e. user will be able to immediately demonstrate to DEFEND that they are in fact still in control of their computer and thus the high-risk state is unwarranted, and DEFEND should "learn" that their recent behavior is normal.
This step-up authentication notification and workflow can be delivered either by SMS or using the Authy platform. If you plan to ask users to step-up and "self-train" in this way, you must provide either SMS service or Authy service configuration details.
Configuring SMS Service
Plurilock DEFEND sends SMS notifications using the secure SMS cloud service Twilio. To configure the SMS Service, visit System Configuration → SMS Service and provide the following information:
- Twilio Account SID
- Account Authentication Token
- Messaging Service SID
NOTE
You need to create a Twilio account at https://twilio.com. To learn more about how to configure the SMS service, see Appendix 1 of this manual.
Enter an SMS Template that will be used as the message sent to the user. In your template, the string "$CODE" will be replaced at send time with the authentication code needed to enable the user to authenticate themselves.
See Configuring Continuous Authentication Service and Checking Continuous Authentication Logs to learn how to enable and use SMS or Authy notifications and step-ups for a particular group of users.

Configuring Authy (Push Notifications)
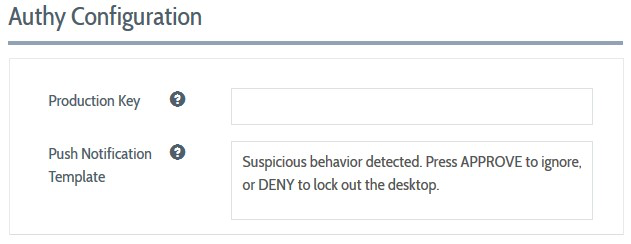
Plurilock DEFEND can send push notifications using the Authy app provided by Twilio. To configure DEFEND's use of the Authy app, visit System Configuration → Authy Configuration and provide the Authy Production API Key.
NOTE
You need to create a Twilio account at https://twilio.com. To learn more about how to configure the Authy service, see Appendix 2 of this manual. Make sure that your endpoint users have the Authy app installed on their phones. Users should also have email addresses provided to be registered with Authy.
Edit the Push Notification Template to contain the notification text that you'd like sent to users configured for this functionality. In addition to this text, the Authy app will show an APPROVE button, which the user will use to indicate that they are still in control of their computer, and a DENY button, which the user will use to indicate that they are not currently in control of their computer (and thus, that someone else is).

Edit the New Device Pause Notification Template to contain the notification text that you'd like sent to users during enrollment period(s). Enrollment periods occur:
- The first time a user connects to DEFEND
- Whenever a user connects a new device to their computer that requires DEFEND to re-learn or perform additional learning about their motion habits
During an enrollment period, DEFEND will send the New Device Pause Notification Template rather than the standard Push Notification Template, and a user's APPROVE action will instruct DEFEND to avoid further alerting for this user for two (2) hours during which all further instances of "atypical" behavior will be used by DEFEND for learning/training purposes on the new device or user profile.
Configuring Health Notifications
Plurilock monitors the integrity of your DEFEND cloud service and will provide timely updates in case of any service interruption or issues. However, you can also configure DEFEND to send automated notices about health status to any desired email destination whenever primary services fail to respond. Notifications can be sent when the following services are interrupted:
Continuous Authentication Service
SMS Notifications Service
Push Notifications Service (Authy)
NOTE
Delivery of these email notices depends on a working email configuration, as outlined above.
To enable the Health Notifications, visit System Configurations → Health Notifications page and check "Enabled" near the top of the page. Select each service for which email notifications are desired.
Use the drop-down selector to choose to send emails either to:
- "Others"
- "Me"
If "Others" is selected, enter a destination email address for each enabled notification. Select "Me" to have notifications sent to your email address (i.e. the email address associated with account belonging to the administrator configuring health notifications).
Configuring Identity Providers
In addition to managing defend using administrator accounts that exist within the DEFEND console, DEFEND also supports the use of centralized identity providers such as Active Directory for the management of administrative accounts and permissions.
To enable administrators in a centralized identity store to log in to DEFEND as administrators, visit System Configuration -> Identity Providers and click Add New to create a new identity provider.
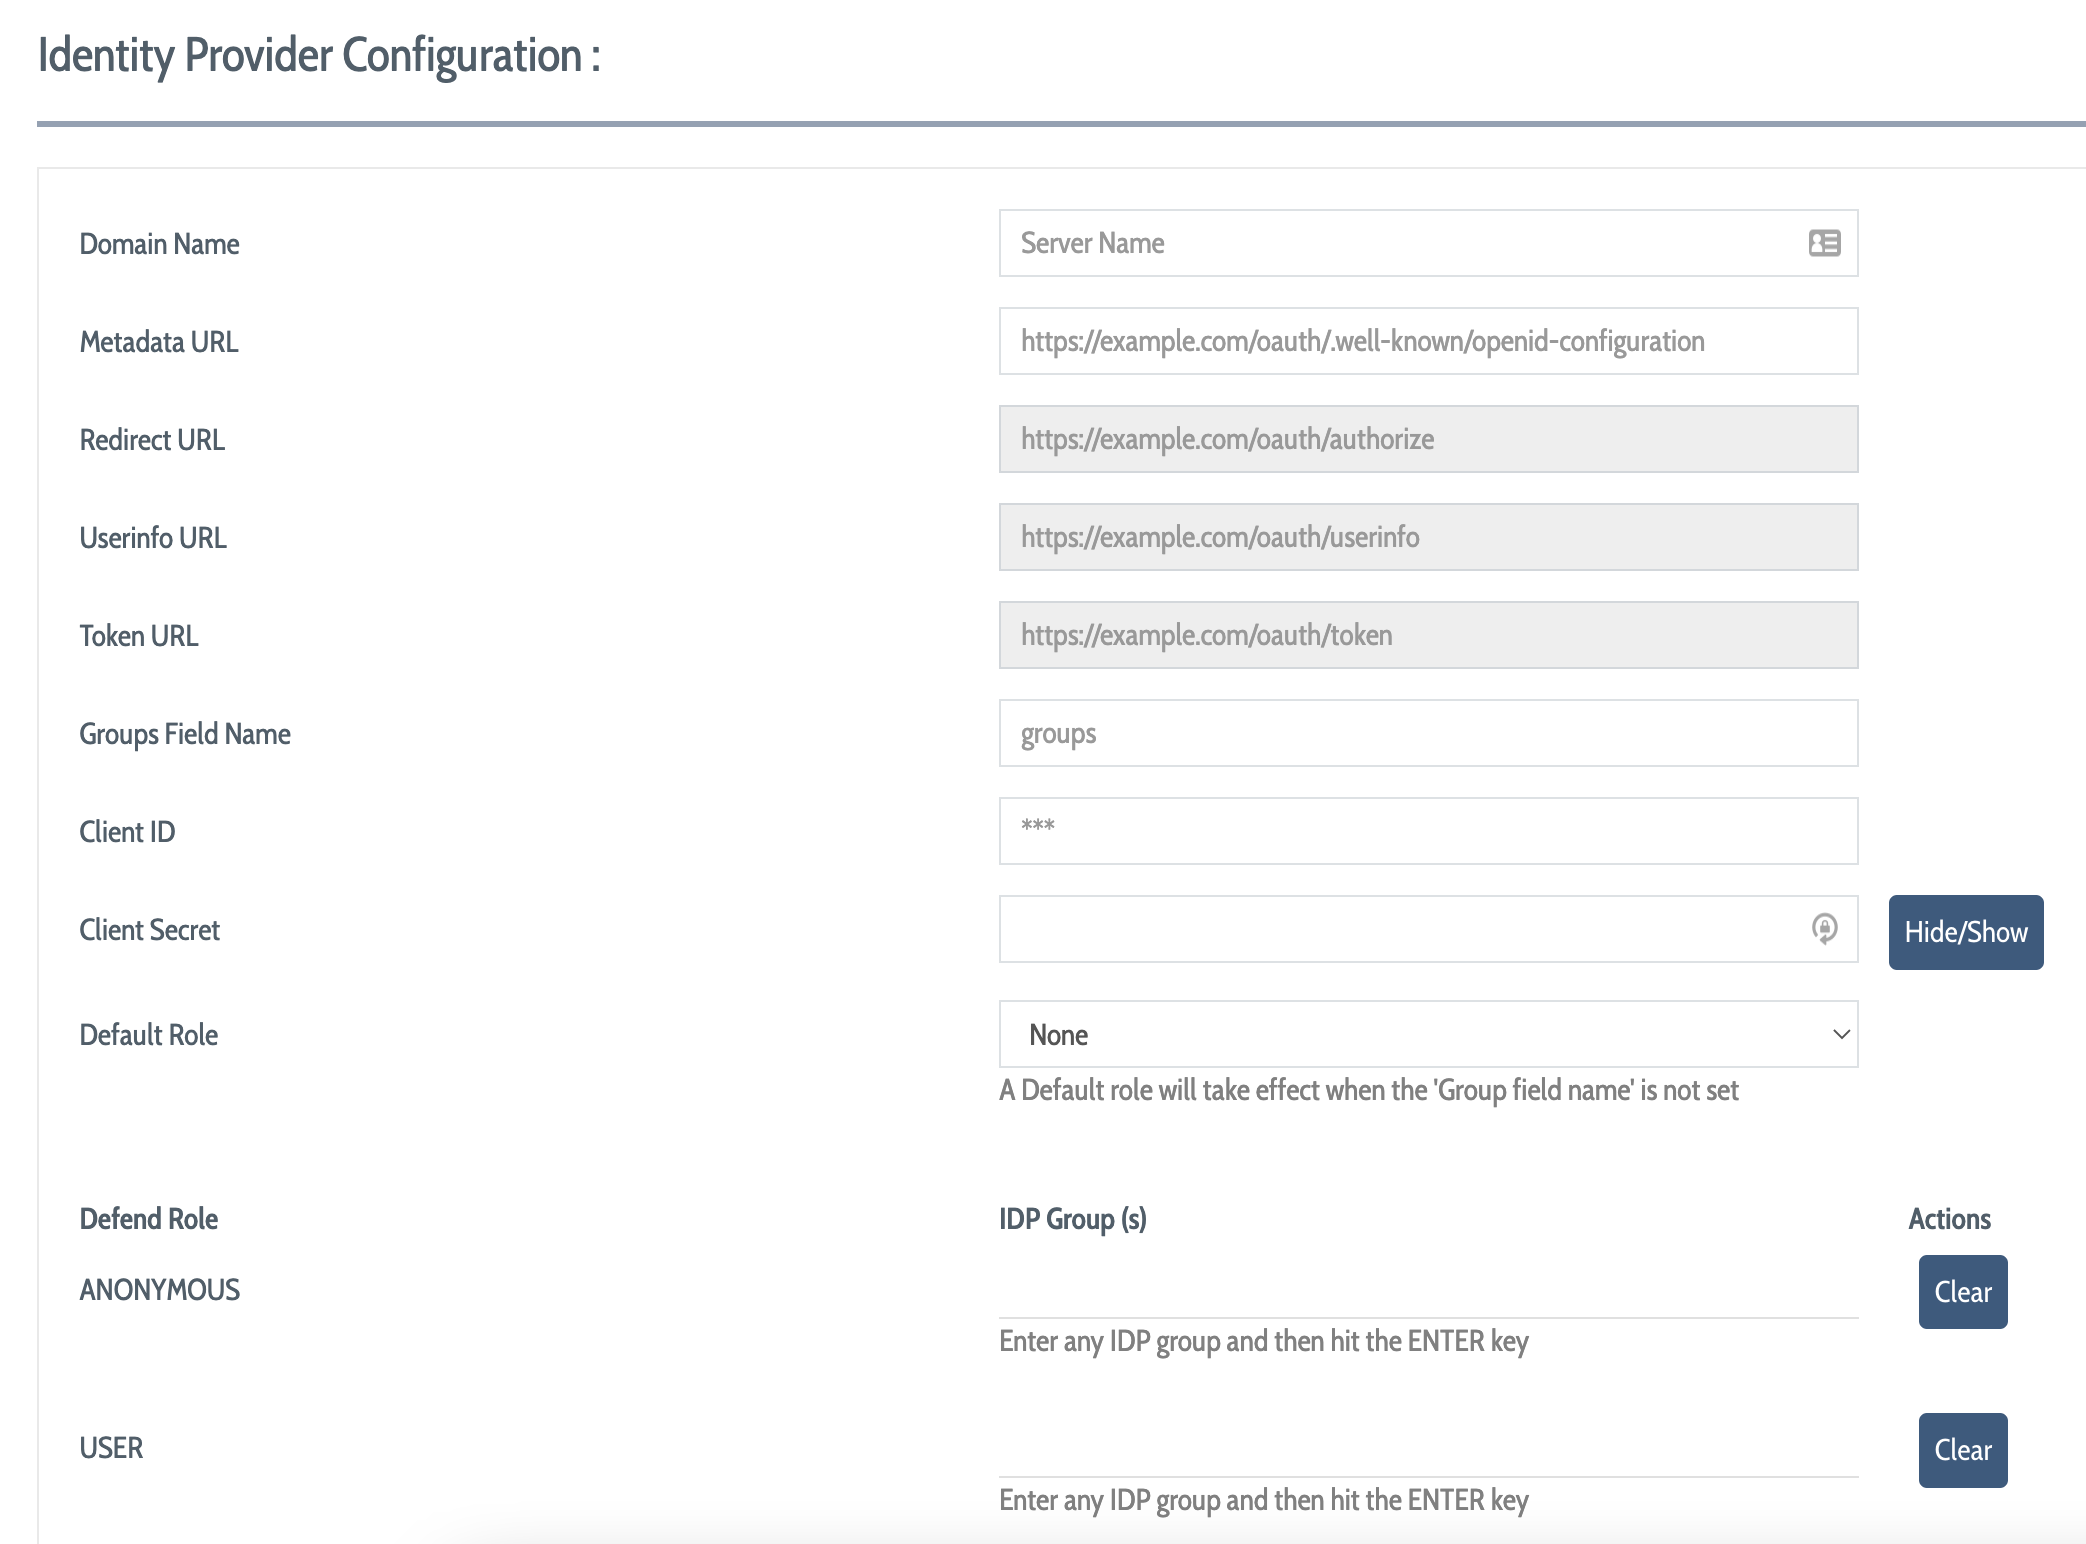
To connect an identity provider to the DEFEND administration console, you must complete a number of fields, then save the resulting configuration.
Provide the Domain Name (server name) of your AD service
Provide the Metadata URL for your OIDC configuration
Provide the Redirect URL for authorizations
Provide the Userinfo URL for user information
Provide the Token URL for generated tokens
Provide the name of the field containing identity store roles in Groups Field Name (the contents of this field will be used to map identity store roles to DEFEND console roles and permissions)
Provide a Client ID and a Client Secret for DEFEND
Provide a Default Role from within your existing DEFEND roles for users that can't be successfully mapped to another existing DEFEND role
Go down the list of your existing DEFEND roles in the lower portion of this view to configure the name of an identity store role that maps to each DEFEND role; this string will be matched against the contents of the groups field that you provided above for role matching
Once configuration is complete, save your changes.
NOTE
Administrative users that log into DEFEND via an identity store should log in with their full user@domain username. Administrative users that log into DEFEND using a local account should log in simply with the username listed for them in the DEFEND console.DEFEND uses the format of the username to determine how to route administrator login requests; usernames in the form of "username" are handled locally, while usernames in the form of "user@domain" are routed to the identity provider.
Configuring Webhooks
In the case that alert(s) that administrators have defined are triggered by user activity, DEFEND can deliver a signal to other platforms, via webhooks, that an alert condition has occurred.
To add a new webhook callout to DEFEND, select System Configurations → Webhooks and click Add Webhook to display the "Creating a new webhook configuration" dialog.
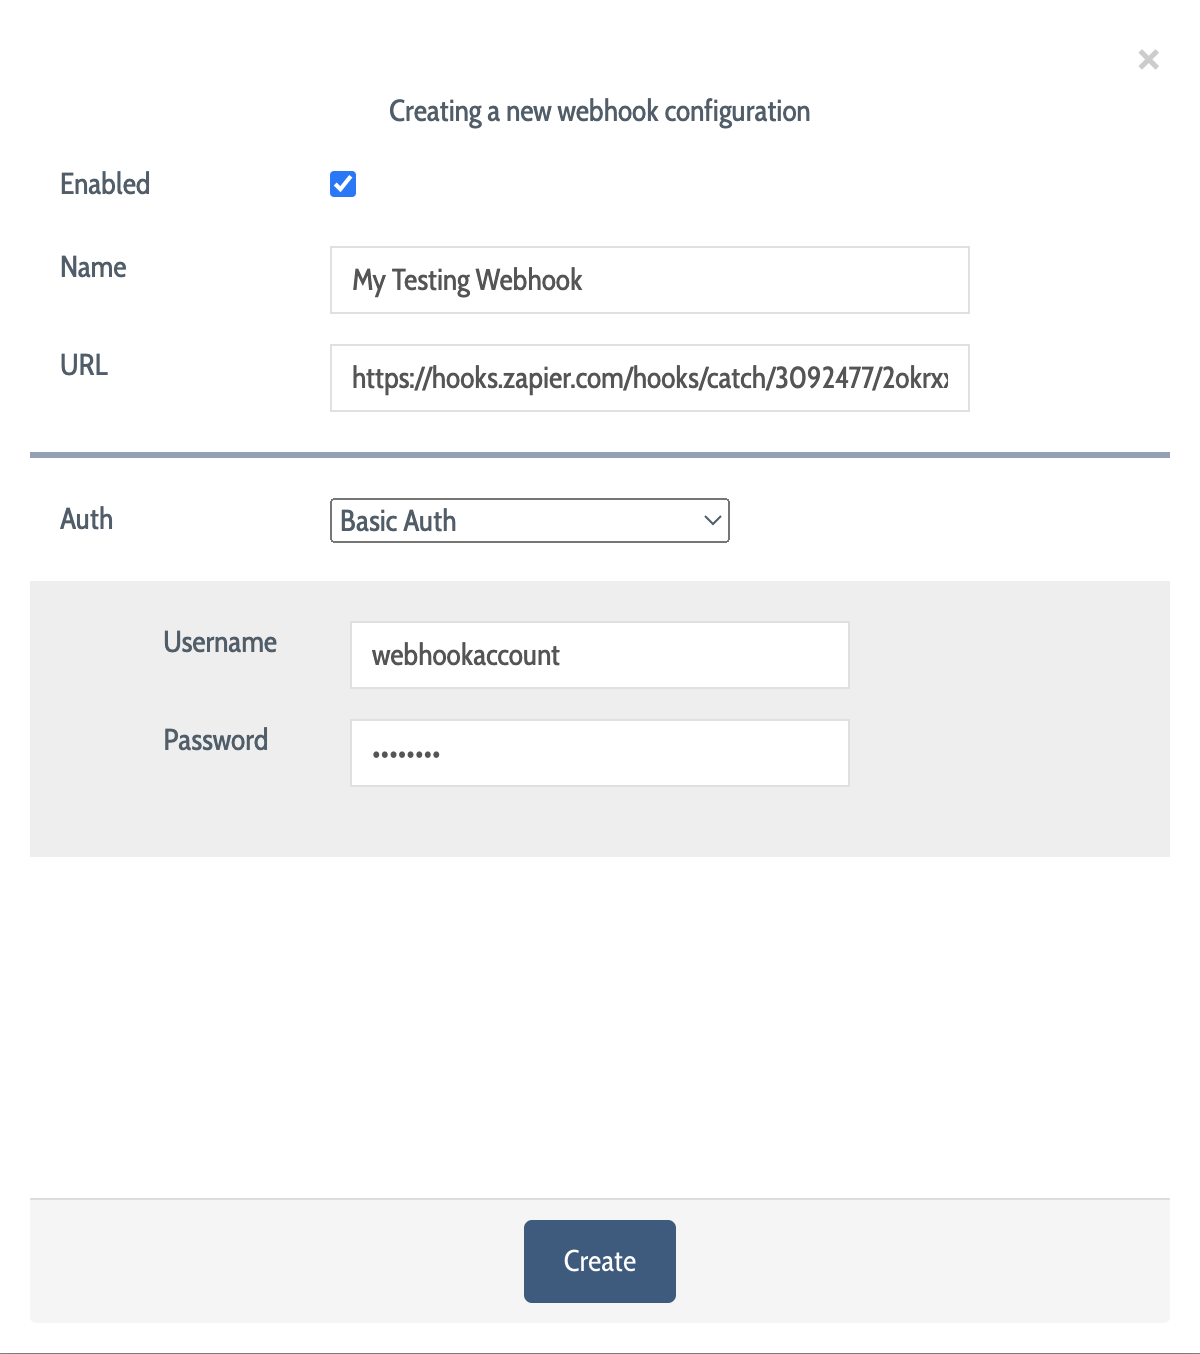
In the dialog, provide the following details:
Name: A human-readable name for this webhook
URL: The URL of the endpoint to which the data will be delivered
Auth: The type of authentication to use when communicating with the URL (see below)
Enabled: When checked, the webhook in question is active and can be used
Supported authentication types include:
API key: Use a key-value pair for authentication, delivered either via query parameters (i.e. "GET" and "POST") or as a part of the request headers. When selected, you will be prompted to provide the key, value, and method of delivery.
Bearer Token: Provide a bearer token for authentication via HTML headers. When selected, you will be prompted to provide the bearer token.
Basic Auth: Use basic web authentication via a username-password pair. When selected, you will be prompted to provide the username and password.
Once your webhook configuration is complete, click "Create" to create your webhook.
Webhook Data Format
When webhook payloads are delivered, they will provide the following key-value pairs to the endpoint:
User: The DEFEND username of the user who triggered the alert
Event Count: The number of qualifying events leading to this alert (taken from the definition of the triggered alert)
Event Time: The amount of time during which these events must have offcurred (taken from the definition of the triggered alert)
Process Name: The name of the foreground process that triggered the alert
Process Pid: The system process ID of the progress that triggered the alert
Host: The hostname of the endpoint from which the user triggered the alert
Action: The action that was tak as a result of the alert (taen from the definition of the triggered alert)
Timestamp: The date and time of the alert
Group: The group to which the user belongs
NOTE
For DEFEND to deliver alert signals to webhooks about any particular user, the following conditions must be met:
- The webhook must be enabled in the webhook configuration.
- The user must belong to a group for which an alert has been defined and activated.
- The webhook option must be enabled for the alert in question.
- Alert conditions must be met.
Table of Contents
- Front Matter
- Trademarks
- Copyrights
- License Conditions
- Disclaimer
- Contact
- Background
- Plurilock DEFEND Platform
- DEFEND Architecture Details
- First Login to the Admin Console
- Creating a Continuous Authentication Site
- Configuring Services
- Configuring Email Service
- Configuring Out-of-band (OOB) Notifications
- Configuring SMS Notifications
- Configuring Authy (Push Notifications)
- Configuring Health Notifications
- Configuring Identity Providers
- Configuring Webhooks
- Webhook Data Format
- Creating and Managing Administration Console Users
- Creating an Administrator Account
- Editing Your Own Admin Account
- Managing Administrator Roles and Permissions
- Continuous Authentication
- Overview
- Deploying Users
- Managing Continuous Authentication Behavior and Enforcement
- Creating and Configuring Groups
- Group Engine and Policy Settings — Application Rules
- Group Engine and Policy Settings — Biometrics
- Group Engine and Policy Settings — Enforcement
- Group Engine and Policy Settings — Data Deletion
- Moving Users Between Groups
- Managing User Biometric Profiles
- Monitoring Alerts
- Using Continuous Authentication Logs
- Understanding Risk Levels and Log Outcomes
- Automated Engine Training
- System Dashboard
- System Audit Logging and Appendices
- Checking the System Log
- APPENDIX 1: Configuring SMS Notification Service
- APPENDIX 2: Configuring Push Notification Service
Was this article helpful?
That’s Great!
Thank you for your feedback
Sorry! We couldn't be helpful
Thank you for your feedback
Feedback sent
We appreciate your effort and will try to fix the article