Using the DLP section
Data loss prevention (DLP) works with compliance and data sharing within the team. With the help of DLP, admins can scan user drive documents and are able to view shared documents and revoke access if necessary.
To view and search for the data in DLP, the admin must first define the compliance and sharing policies from the administration module and ensure it scans only the user drive and shows the results of users in that policy.
Compliance
- Compliance is a part of Data Loss Protection (DLP), from where the admins can define the security categories
- Go to Dashboard ➔ Administration ➔ Compliance
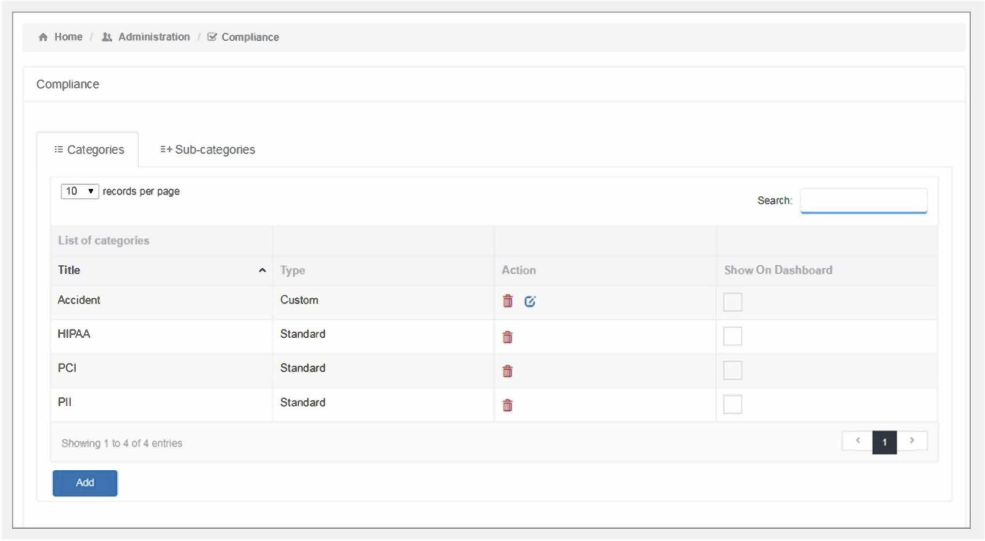
The admin can add security compliance - PHI, HIPAA, PlI, PCI categories internally depending on complexity implemented with the organization domain. Including categories, the admin can add the subcategories to increase network security level for the company.
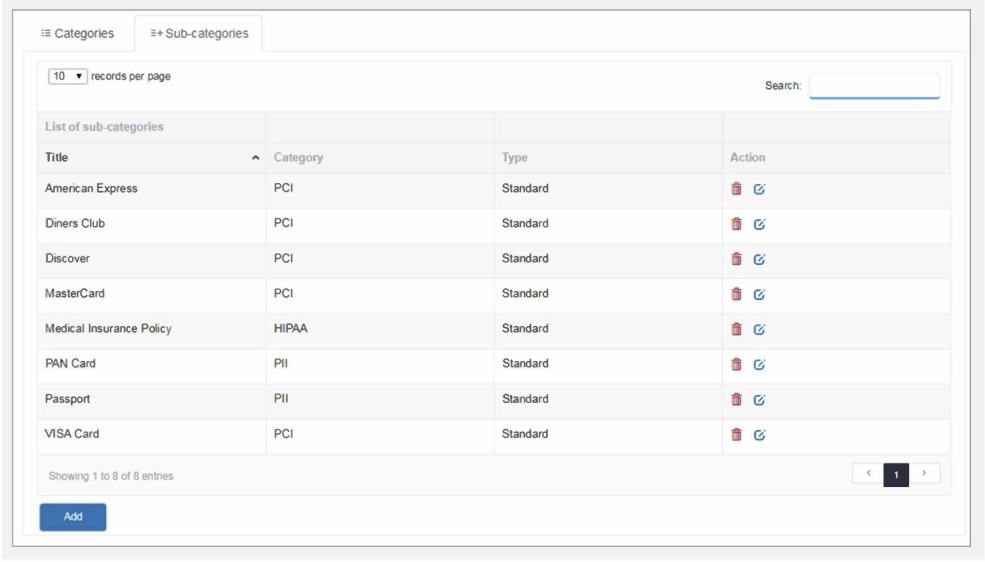
- If required, the admin can define their company compliance category including sub category
- Go to Administration ➔ Compliance ➔ Click Add ➔ Click on ‘+’ icon to define your compliance
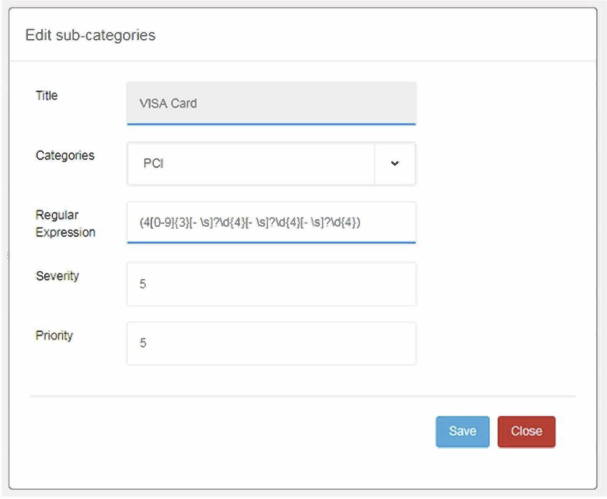
- Add title
- Select category from the drop down menu
- Select a regular expression for that particular sub category
- Select the severity and priority.
- Click “SAVE”
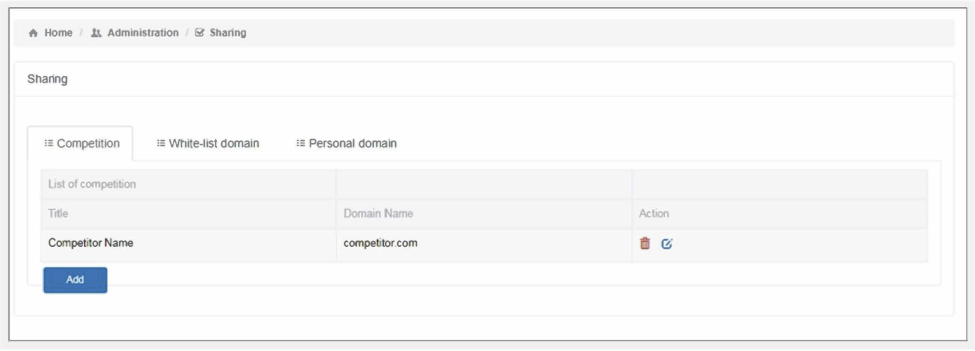
Sharing
- The admin should define three sharing rules - competition domain, whitelist domain, and personal domain
- Go to Dashboard ➔ Administration ➔ Compliance
- Competition Domain - The admin can define the competitor’s domain
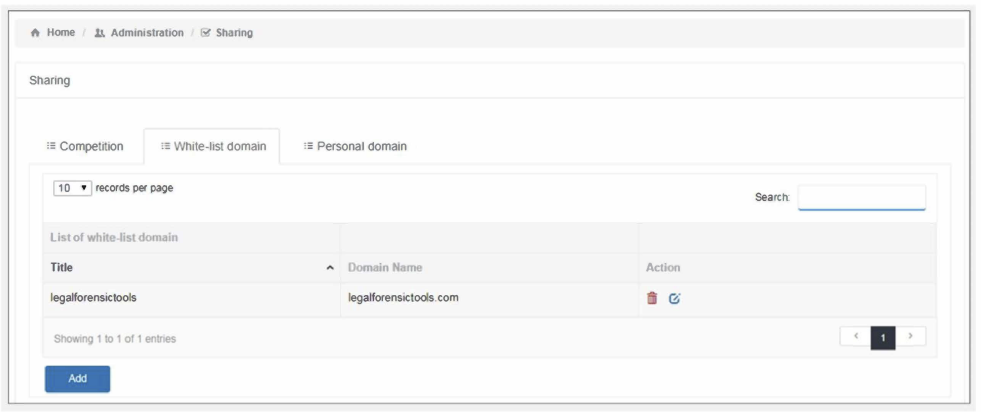
- White-list Domain - The admin can define the domain name to share the data across
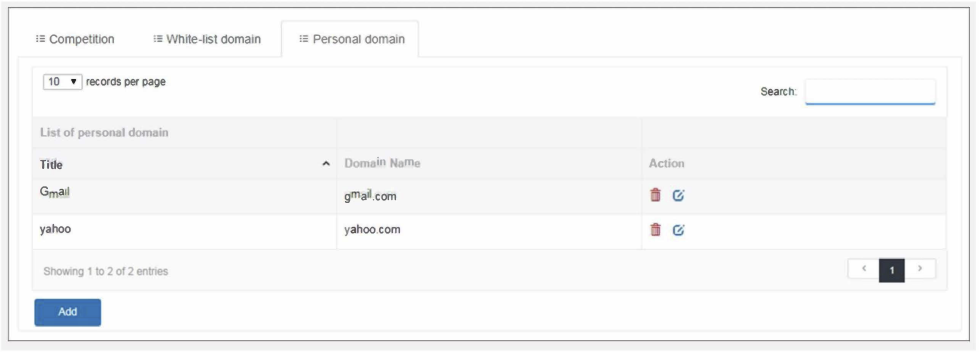
- Personal Domain: The admin can define the personal domain name like as Gmail, Yahoo etc.
This way, the admin adds compliance and sharing policies, now these policies will be viewed and searched under DLP module.
The DLP module includes:
- Policies
- View
- Search
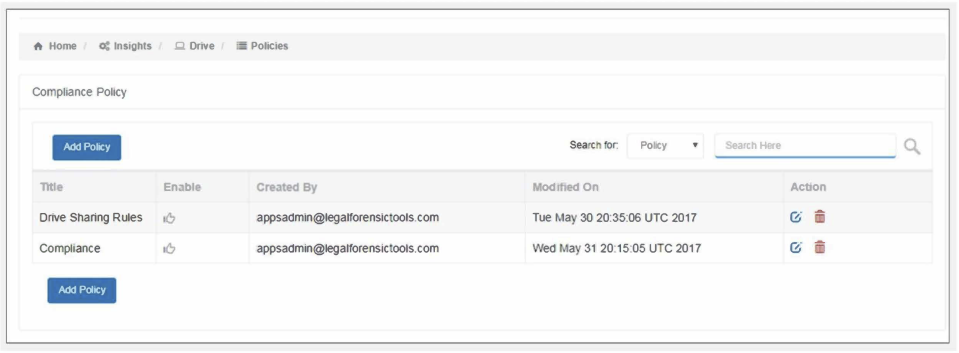
Policies
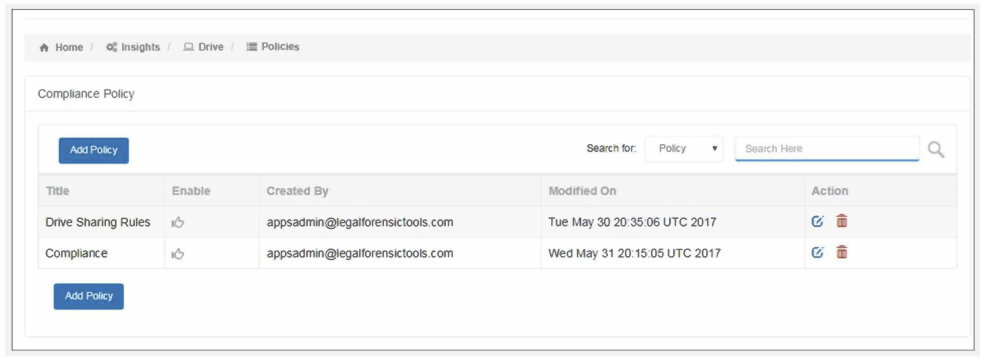
To add the DLP policies, go to Dashboard ➔ DLP ➔ Policies
For Compliance, click “ADD POLICY”
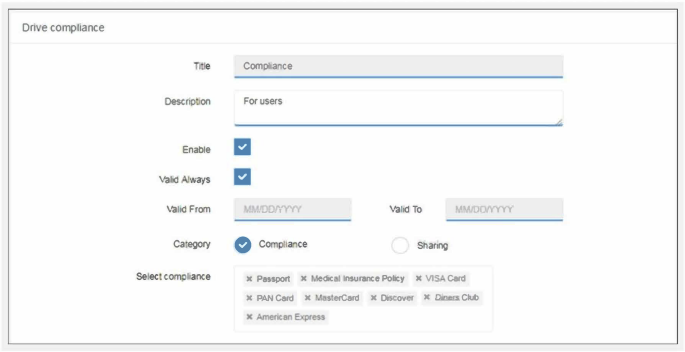
To create a new policy, fill in the policy details.
- Title: Name your policy to identify it later when you want to make changes quickly
- Description: Short description of the policy (helpful for multiple admins)
- Enabled: If you want the policy to be disabled for some time or to re-enable it, you can check/uncheck “enabled” option as shown above.
- Valid Always: You can decide the validity of the policy with “validity always” button. Toggle if you want a policy for a stipulated time or a policy which is always applied.
- Valid From and Valid To: If “valid always” is off, then you will have to provide the date range the policy. This way the admin won’t need to manually turn off the policy.
- Check Category “Compliance”
- Select Compliance from the drop down box (Admins can select compliance which they must define under the Administrator ➔ Compliance)
- Policy type should be user based or OU based. If your policy type is user based, you will add single user or bulk user (import CSV) in the policy and for OU based you will be able to select your OU in Plurilock AI
Click on SAVE to save the policy created
For Sharing, click “ADD POLICY”
To get started with the creation of the new policy, fill in the policy details.
- Title: Name your policy to identify it later when you want to make changes quickly
- Description: Short description to describe the policy (helpful for multiple admins)
- Enabled: If you want the policy to be disabled for some time or to re-enable it, you can check/uncheck “enabled” option as shown above.
- Valid Always: You can decide the validity of the policy with “validity always” button. Toggle if you want a policy for a stipulated time or a policy which is always applied.
- Valid From and Valid To: If “valid always” is off, then you will have to provide the date range the policy. This way the admin won’t need to manually turn off the policy.
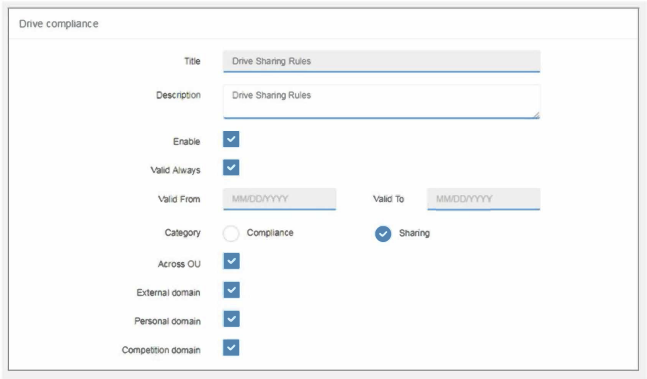
- Check category is “Sharing”
- Select sharing from the drop down box (admins can select sharing which they must define under the Administrator ➔ Sharing)
- Select the check boxes - across OU, external, personal, competition domain to get a detailed view of the sharing feature
- Policy type should be user-based or OU-based. If your policy type is user-based, you will add single user or bulk user (import CSV) in the policy and for OU-based you will be able to select your OU in Plurilock AI
Click on SAVE to save the policy created
View:
- To view the DLP policies, go to Dashboard ➔ DLP ➔ Policies
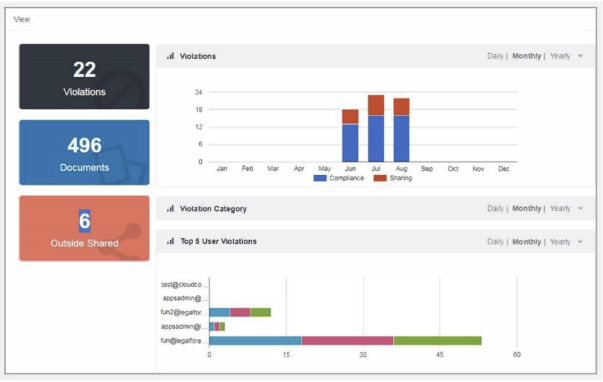
- Here, the admin sees a graphical presentation regarding policy violations, scanned documents, and documents shared outside
- Admins can also view the violations graph related to compliance and sharing, violation category and top 5 user violations daily, monthly, yearly
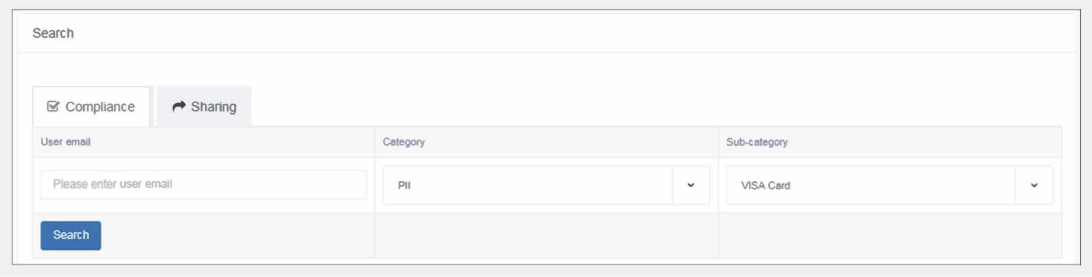
Search
Compliance
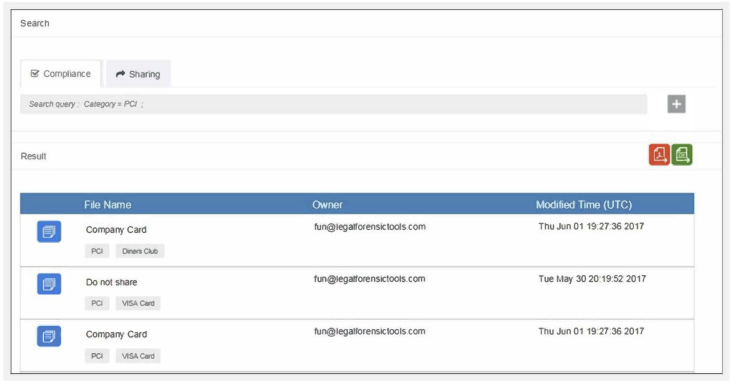
Compliance search is used to search scanned documents applied to a respective user, category, or subcategory
Admins can search for scanned document by any of the filters:
- User Email
- Category or
- Sub Category
The admin can also apply any of one or two filters or all three filters at a time to search the scanned document.
The results are shown in below format
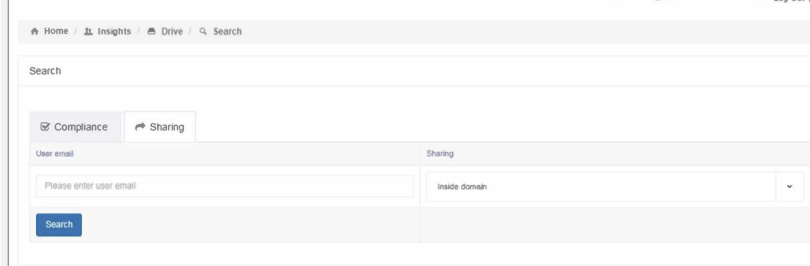
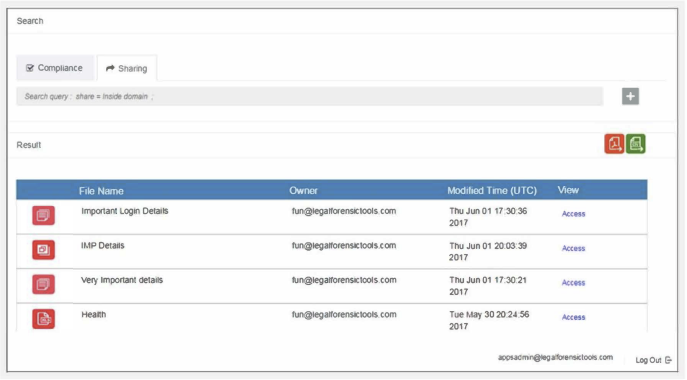
Sharing
Admins can search shared documents by adding user email or sharing inside the domain by select the items from drop-down menu.
The admin can search for scanned document by any of these filters:
- User Email
- Category
Admins can apply both the filters at a time, or can also search by any one filter
The results are shown in the format below.
Was this article helpful?
That’s Great!
Thank you for your feedback
Sorry! We couldn't be helpful
Thank you for your feedback
Feedback sent
We appreciate your effort and will try to fix the article