Jump to: macOS Agent Installation | macOS Agent Update | macOS Agent Uninstallation
macOS Agent Installation
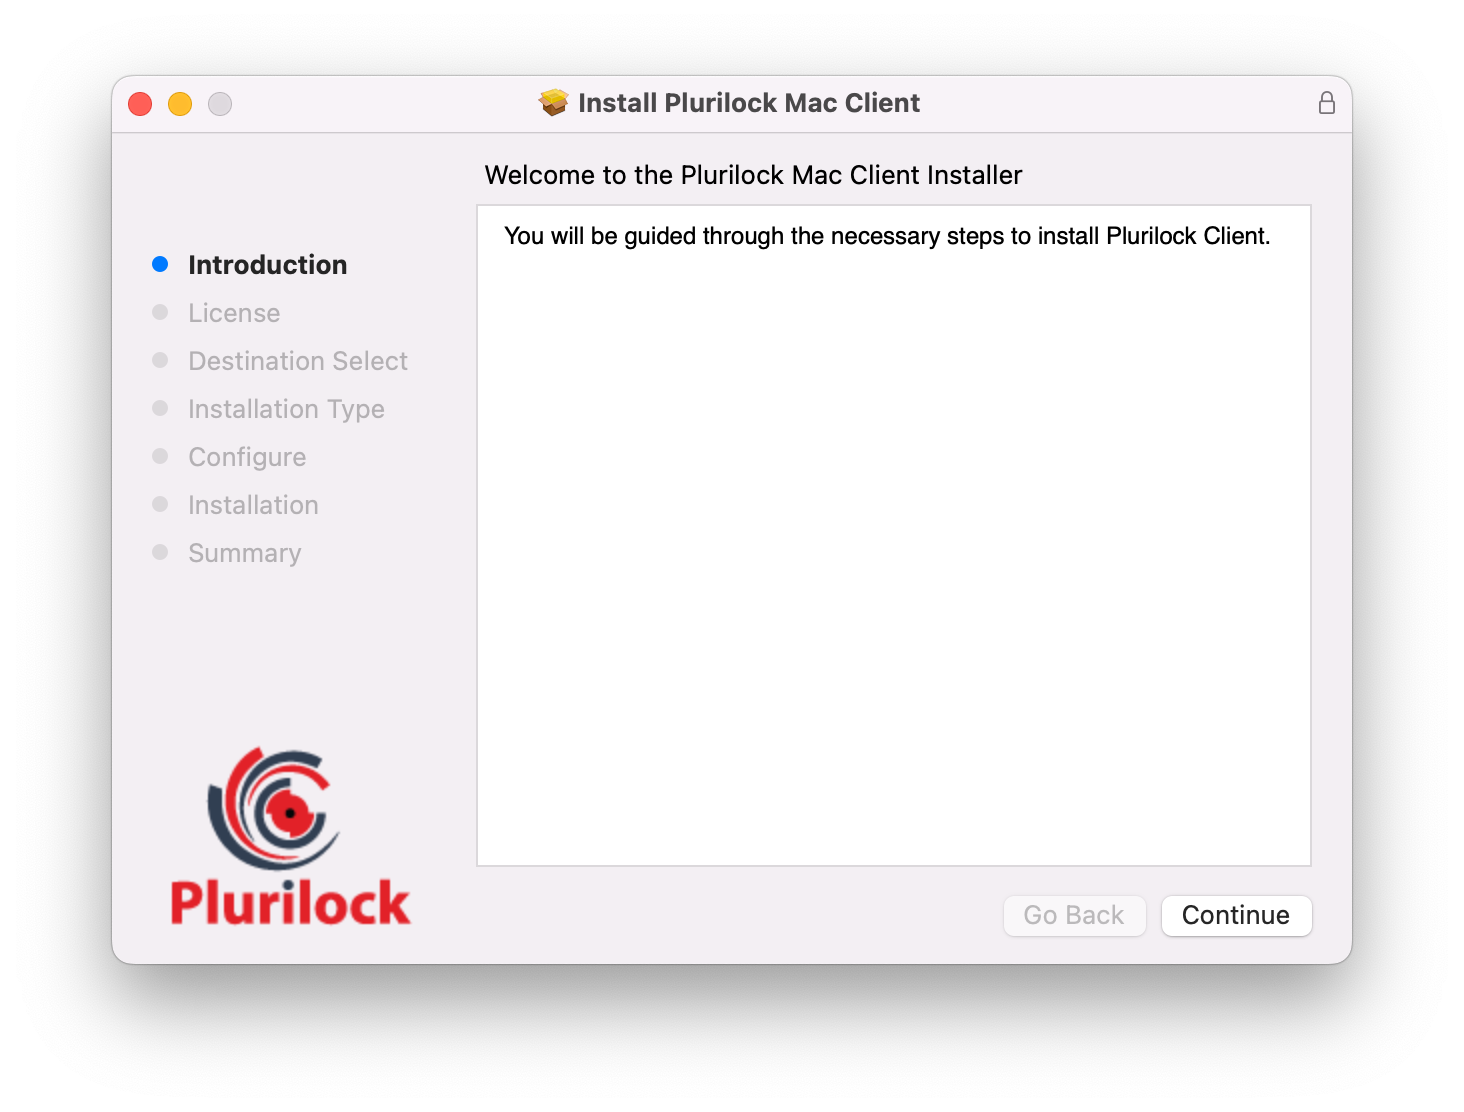
Double click on the installation file to run the installation process. In the new window, click Continue.
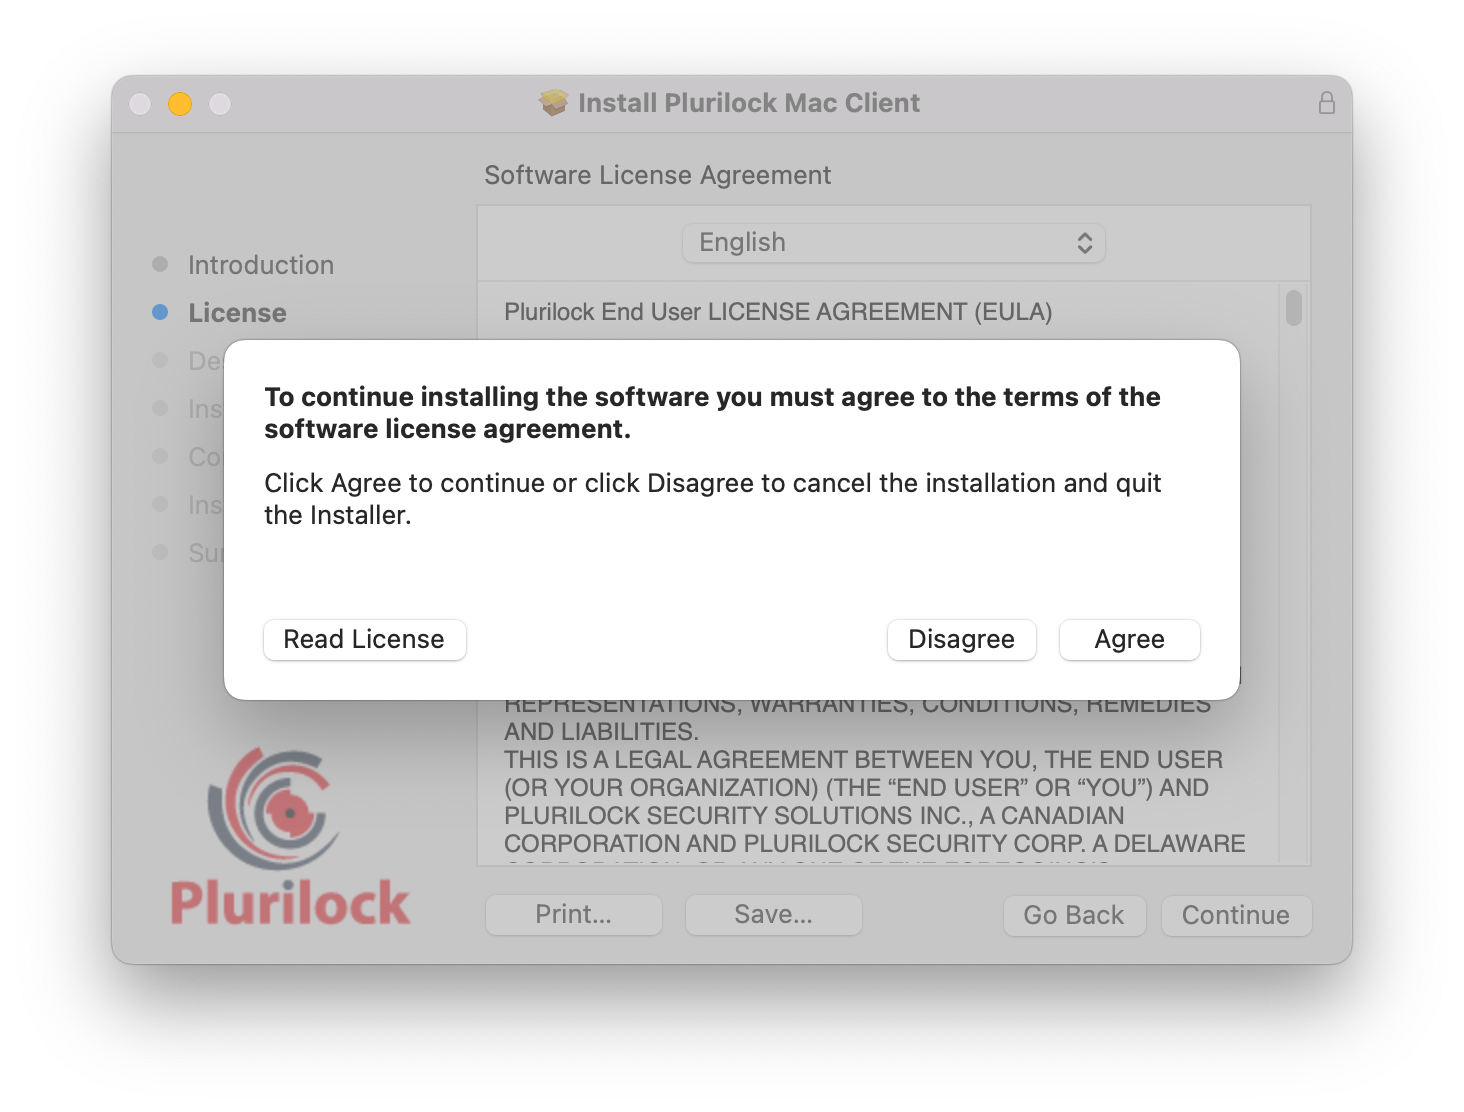
Review the License Agreement and click Continue.

In the new window, click Agree to confirm that you accept the License Agreement.
Review the installation type and click Install.
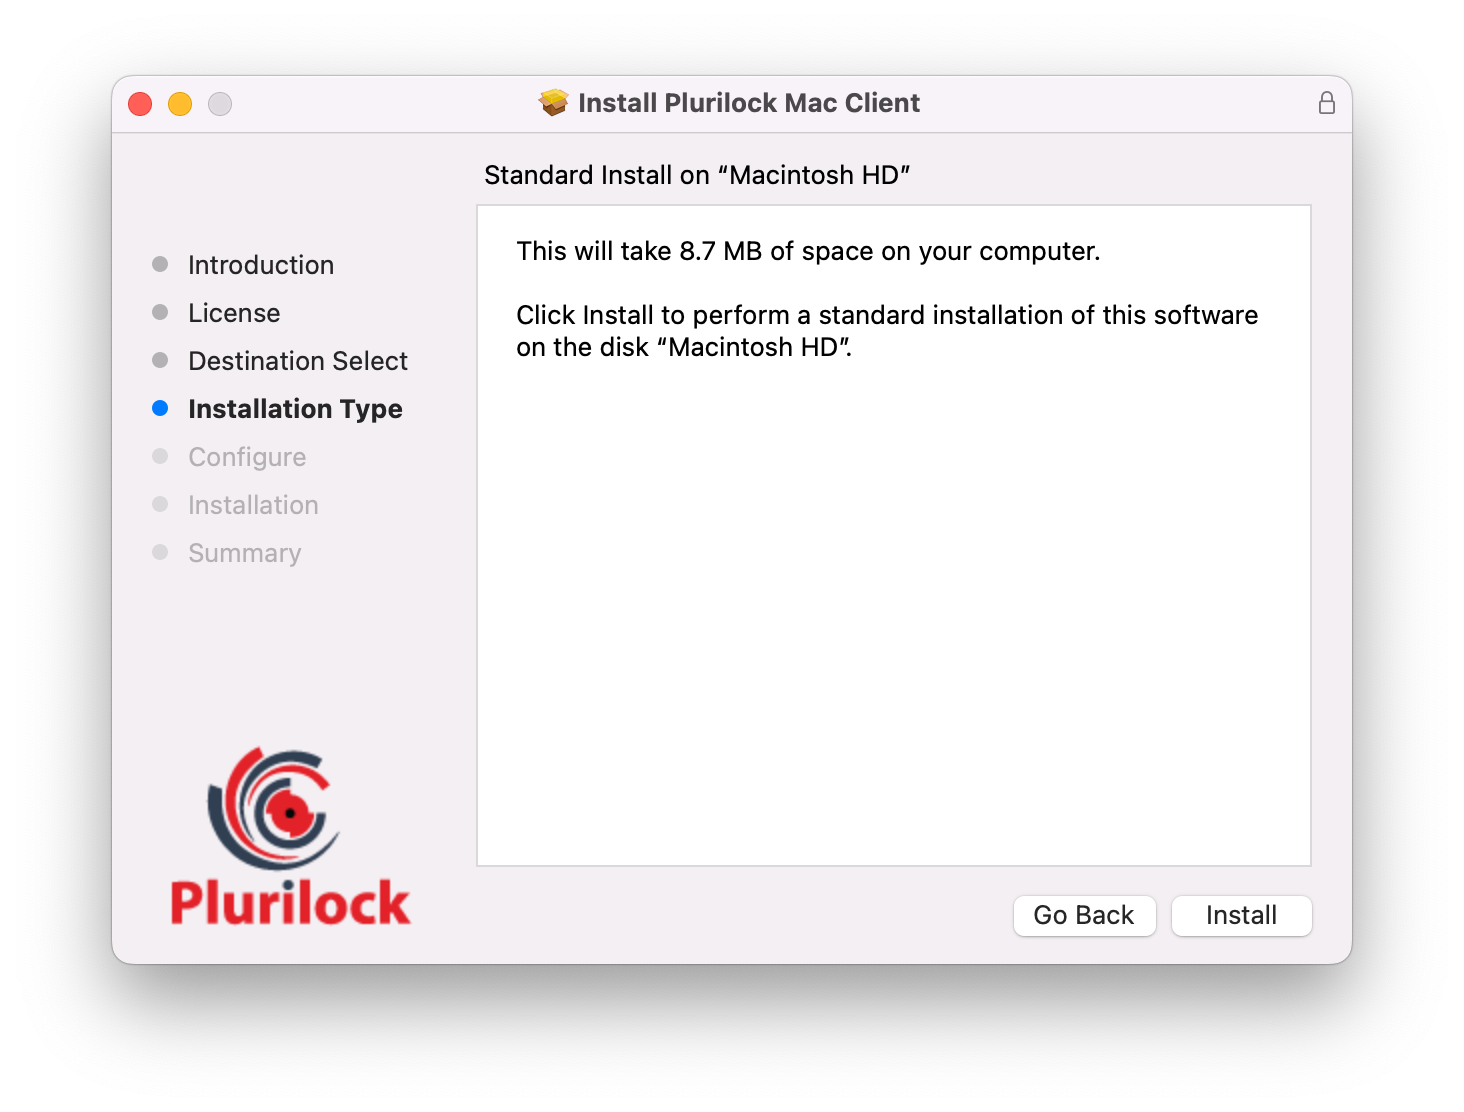
Tip: You may see a macOS “Install Software” pop-up, asking if you want to allow the program to install software on the computer. Provide the admin password and click “Yes.”Specify the Registration URL (Plurilock Server URL), port number, and Site Master Key.
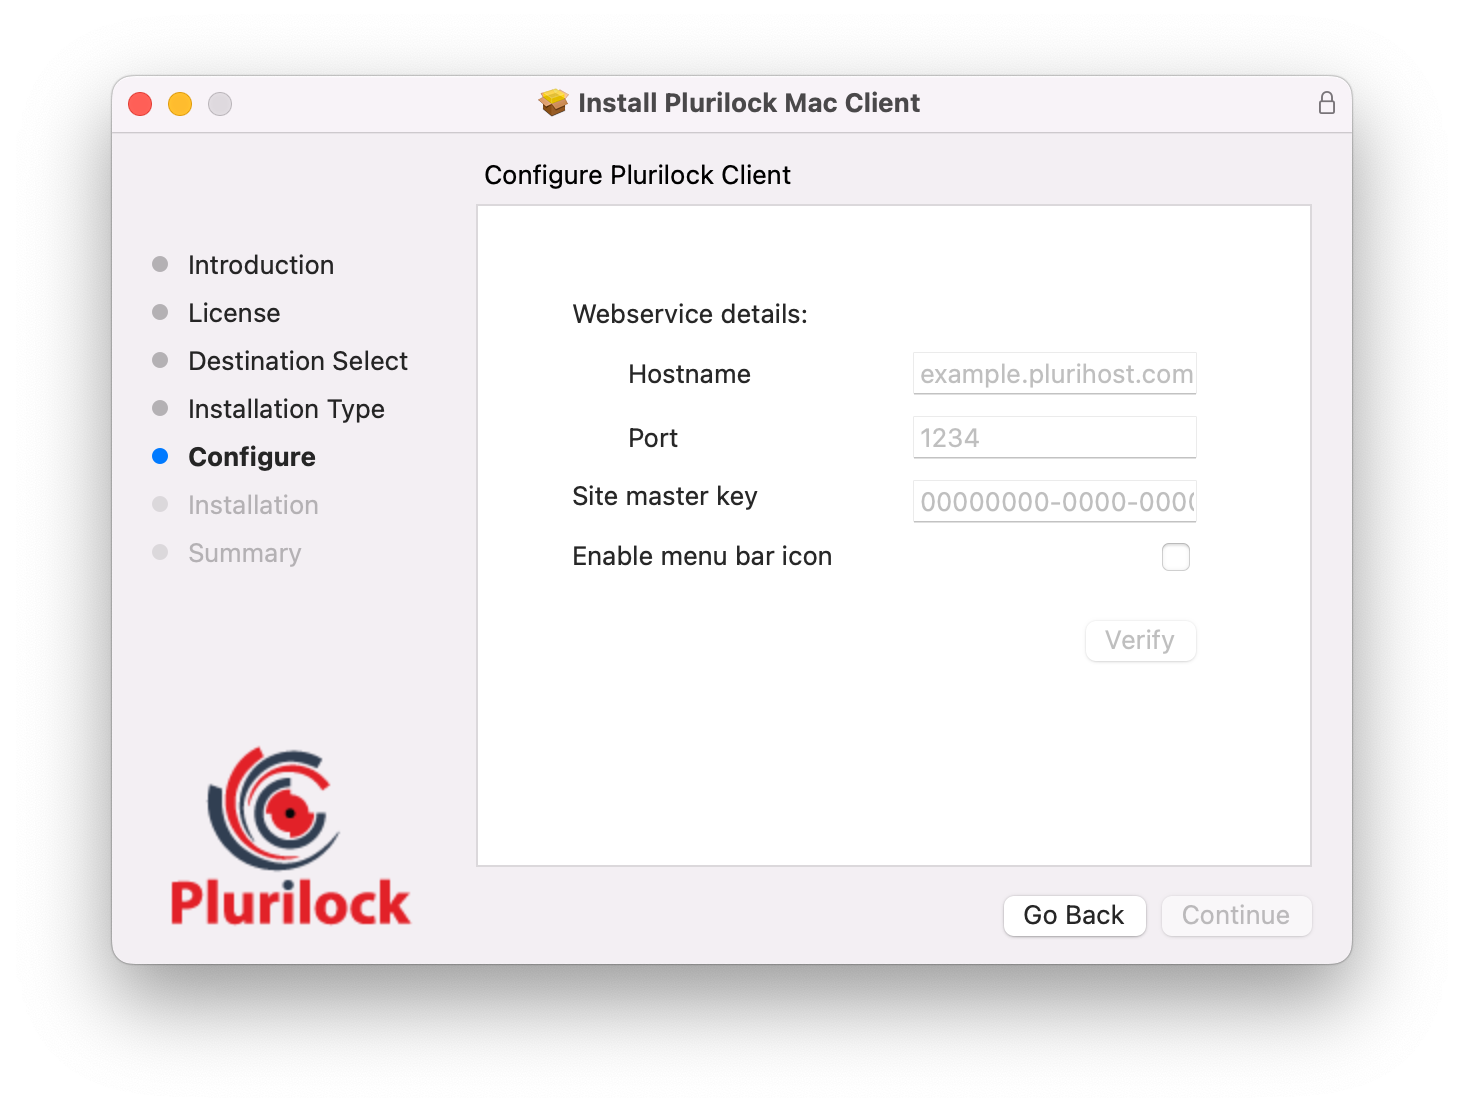
Tip: Select 'Enable menu bar icon' if you want the Plurilock agent to be visible, including enrollment progress.NOTE
The default format of registration URL is:- https://yourcompany.plurihost.com/webservice.
- The default port is 443.
- The URL, port, and master key will be provided to you by Plurilock.
If no errors are encountered, you will get this message once the installation is complete.
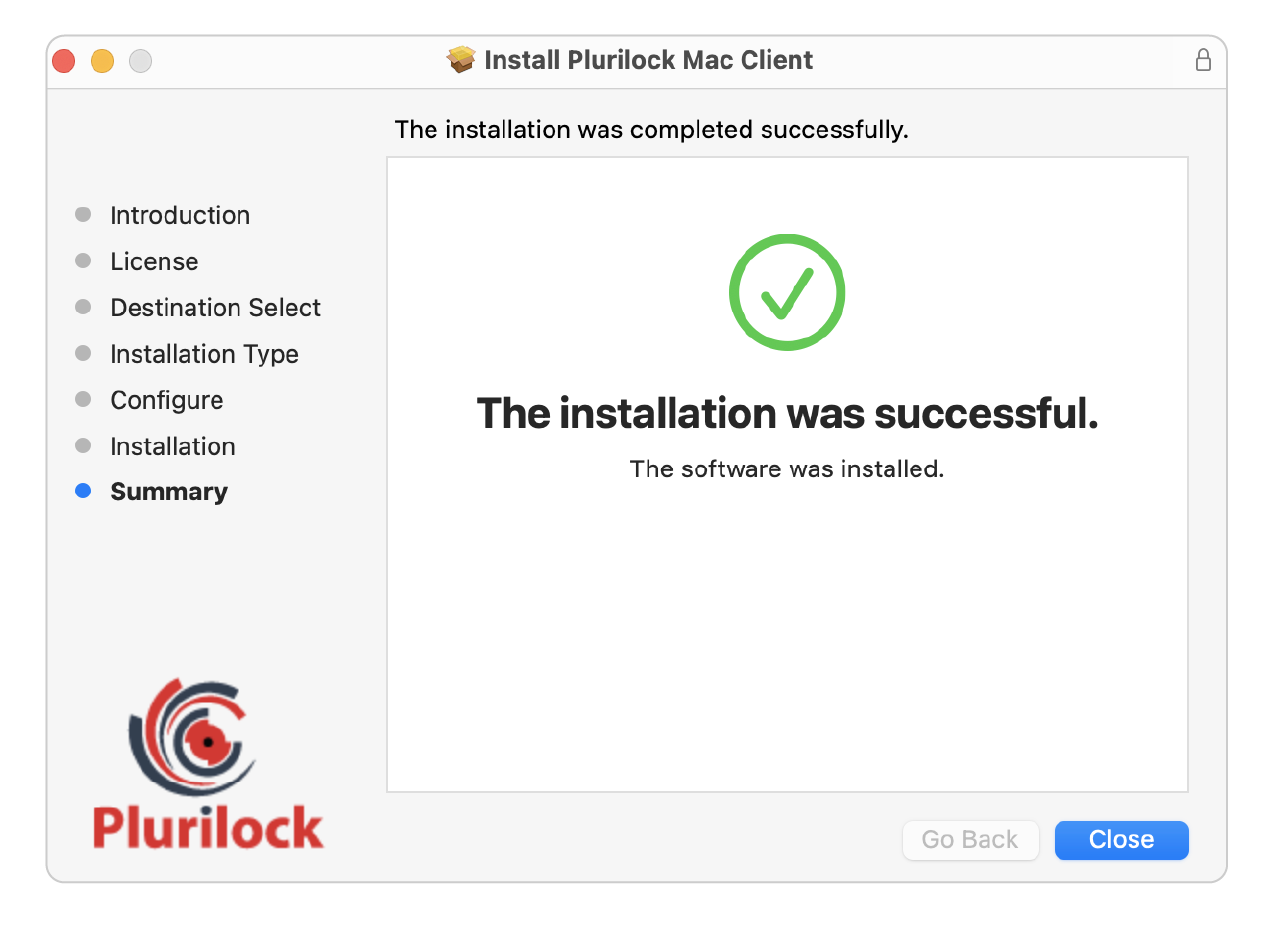
Click Close to close the installation confirmation dialogue.
macOS Agent Update
To update the macOS agent to a new version, double click on the new installation file to run the installation process. Go through the standard installation steps until you reach the Configure page.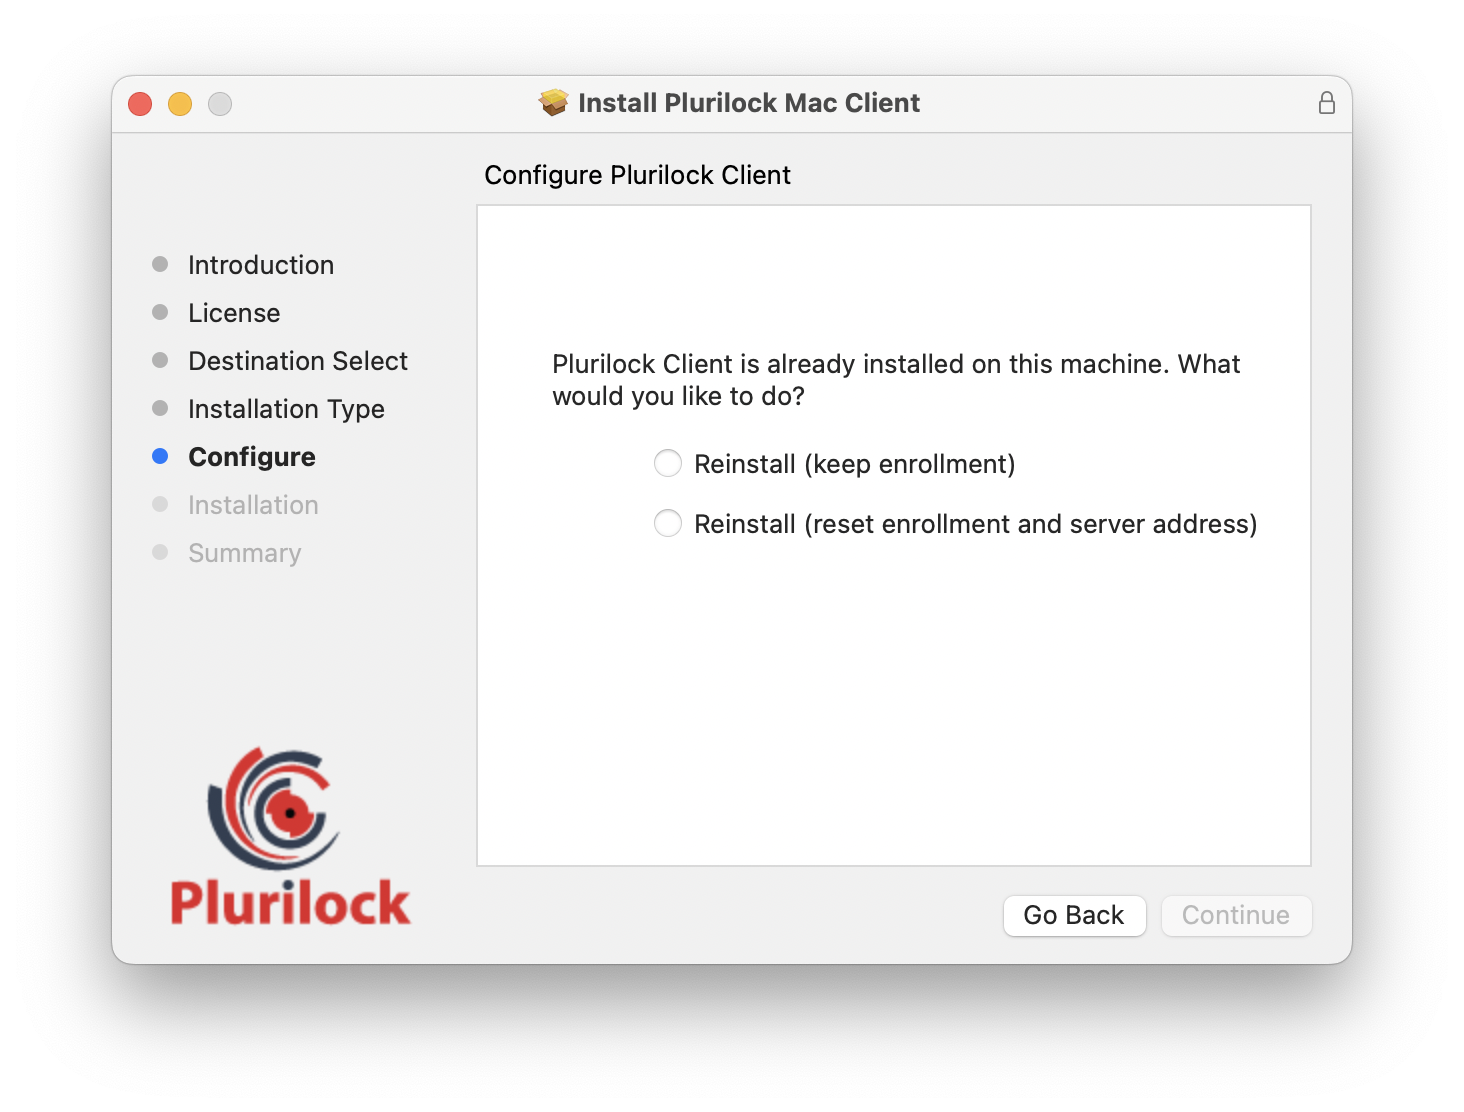
Here you have two options: to update the agent, but keep the old connection configurations, OR to update the agent and use new connection configurations.
Select Reinstall (keep enrollment) to update the agent and keep the old connection configurations. You do not need to provide any additional information. Click Continue to start the update process.
Select Reinstall (reset enrollment and server address) to update the agent and use new connection configurations. In this case, the installer will prompt you again for a server URL, port, and a master key. Click Continue to start the update process.
NOTE
Even if you provide the same server address and a master key, a new authentication key will be assigned to your agent and the enrollment process for your device profiles will start from the very beginning.
macOS Agent Uninstallation
To uninstall the Plurilock agent on macOS using the uninstaller application:
- Download the Plurilock DEFEND Uninstaller zip file from the DEFEND downloads area.
Double-click the .zip file (‘Plurilock DEFEND Uninstaller.zip') to extract the uninstaller.
Double-click the extracted ‘Plurilock DEFEND Uninstaller' application to run it.
In the new windows, click Yes confirming that you want to uninstall the agent.
Table of Contents
- Front Matter
- Trademarks
- Copyrights
- License Conditions
- Disclaimer
- Contact
- General Information
- The Endpoint Agent
- Plurilock Agent Requirements
- The Plurilock Windows Agent
- Windows Agent Installation
- Windows Agent Update
- Windows Agent Uninstallation
- Mass Deployment
- The Plurilock macOS Agent
- macOS Agent Installation
- macOS Agent Update
- macOS Agent Uninstallation
- User Enrollment
- Agent Systray Icon
Was this article helpful?
That’s Great!
Thank you for your feedback
Sorry! We couldn't be helpful
Thank you for your feedback
Feedback sent
We appreciate your effort and will try to fix the article